One of first differences when you start using X11 is that you can just select any text on screen and press middle mouse button to paste it back. But, after a while you end up in situation where you did ctrl+c in application, and somehow you expect that middle mouse button will paste it back.
X11 implementation of copy/paste is much more complicated, as you might read from excellent X Selections, Cut Buffers, and Kill Rings.
Most of the time, having two different clipboards is very useful. Think about copy/pasting url and title at the same time from one web page to another (like I do often when writing blog posts like this one).
So, how to we manage buffers more efficiently? First, install xclip and try it out:
dpavlin@t61p:~$ xclip -h
Usage: xclip [OPTION] [FILE]...
Access an X server selection for reading or writing.

  -i, -in          read text into X selection from standard input or files
                   (default)
  -o, -out         prints the selection to standard out (generally for
                   piping to a file or program)
  -l, -loops       number of selection requests to wait for before exiting
  -d, -display     X display to connect to (eg localhost:0")
  -h, -help        usage information
      -selection   selection to access ("primary", "secondary", "clipboard" or "buffer-cut")
      -noutf8      don't treat text as utf-8, use old unicode
      -version     version information
      -silent      errors only, run in background (default)
      -quiet       run in foreground, show what's happening
      -verbose     running commentary
Help output is probably a little verbose, but just remember following things:
- -in is default
- -out displays content
- default selection is primary (which is content you marked on screen)
- -selection clipboard is only other thing you need to rember
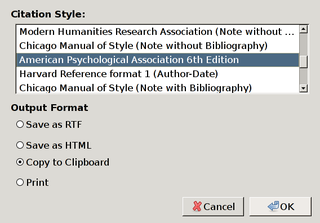
# display selected text
xclip -out

# display clipboard (copy/paste in applications)
xclip -out -selection clipbaord

# transfer selection into copy/paste buffer
xclip -out | xclip -selection clipboard

# transfer selection into copy/paste buffer
xclip -out -selection clipboard | xclip
Last example is useful if you want to paste something back in terminal and it somehow ended up in copy/paste buffer, following is Zotero example:
Just let your imagination go wild: what if you have only textarea and you want to do some massive editing for which vi whould be better? You can install excellent It's All Text! Firefox extension but, you could also write something like this:
xclip -out > /tmp/$$.txt && vi /tmp/$$.txt && xclip -in -selection clipboard < /tmp/$$.txtYou could bind that to a key in your window manager or start different editor if you wanted to... or I guess live can be simple again if you just install autocutsel
Few days after I wrote this blog post, I had interesting problem. I was trying to decrease font size in firefox and I found instructions which included filename and content itself. I copied content with Ctrl+C and selected filename and used this little gem:
xclip -sel clipboard -out > `xclip -out`