Results matching “search”

usb-extesion-cable.jpg I recently got big screen TV (big for my living room at least). It came with few HDMI ports and VGA, so next logical step was to connect computer to it. And of course, then I noticed that it would be really handy to have wireless keyboard and mouse to complete this nice setup. However, I also wanted to ssh over that networks, so I started examining how secure wireless keyboards are. tl;dr; summary: they are not secure.

First I asked for suggestions which wireless keyboard to buy. I have quite big fingers, so mini models just doesn't do it for me. I got suggestion to take a look at Logitech K400 and sure enough it seemed like good choice. One of first things that I noticed is that it supports 128-bit AES encryption. I started to have a good feeling about it, but I wanted to know more, so I hoped to Logitech Advanced 2.4 GHz Technology pdf and discovered that not all keys are encrypted.To quote documentation:

The encryption applies to all standard keyboard keys (a, s, d, f...) and modifiers (Shift, Ctrl, Alt...). The multimedia keys (Play, Pause, Mute...) that may be implemented in some keyboards are transmitted in clear text.
How can I trust keyboard which doesn't encrypt all traffic? This got me thinking. Can I somehow verify that keys are encrypted? Is this wide-spread problem? Can I make mistake and broadcast my keystrokes to whole world?

Sure I can. For older 27Mhz keyboards there is KeyKeriki v1.0 - 27MHz project which implement sniffer for it (video DeepSec 2009: Keykeriki: Universal Wireless Keyboard Sniffing For The Masses). But, Logitech is 2.4Ghz, so it's secure, right? Well, there is KeyKeriki v2.0 - 2.4GHz which does same for 2.4Ghz (video Keykeriki V2 - Practical Exploitation of Modern Wireless Devices [SIGINT10]). OK, Logitech does some kind of AES on top of that, but since it does transfer some keys unencrypted, and it's proprietary technology I can't really check that.

I also got suggestion to use bluetooth keyboard because it's secure. Well, quick search revealed Ubertooth One which basically defeats bluetooth protection with a bit of sniffing and a little brute force.

By this point, I was puzzled. Is there secure wireless keyboard with touchpad which I can buy? Something I can be sure that it encrypts all traffic as opposed to only some keys? Or is usb extension cable only real solution for me?
Allmost a year ago, me and three other friends decided it's a very good idea to support Printrbot kickstarter project and get our-selfs 3D printer. We didn't have any particular use for it (other than printing Raspberry Pi case when it arrives) but it seemed like the right thing to do. This post will try to explain how far did we manage to get with it and why we where wrong.

If you examine original Kickstarter page you will see following description:

A desktop 3D printer you can build in a couple hours. Print plastic parts you design or download - even parts for another printer.
Our experience can't be further from that statement. For a start, Brook Drumm (to whom I'm ethereally grateful for his efforts to make 3D printers commonplace) got his campaign funded with 1,808 backers who spent $830,827 instead of just $25,000 goal he envisioned. This was both good and bad. Good part was that after funding we knew that we will have 3D printer (I'm carefully not mentioning printing anything), but the bad part was logistics: there was simply no way he would be able to print 1808 versions of original design on 3D printers themselves (idea of RapRap-like printers, which Printrbot was one iteration, was always to make them self-replicating). So, he decided to change design and move toward wooden laster-cut parts for most of construction, and print just parts which where necessary.

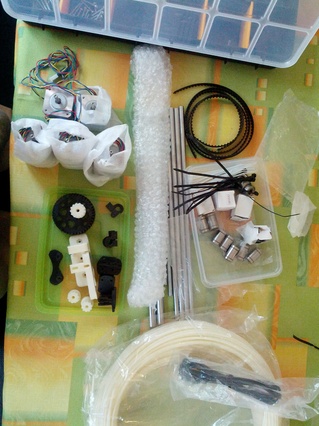
This also introduced significant delay in printer shipment, but when you are funding Kickstarter project, you should be prepared for it, so I'm not complaining. When it finally arrived this summer (10 months after end of Kickstarter campaign), it was significantly bigger than I expected:

IMG_20120907_174405.jpg

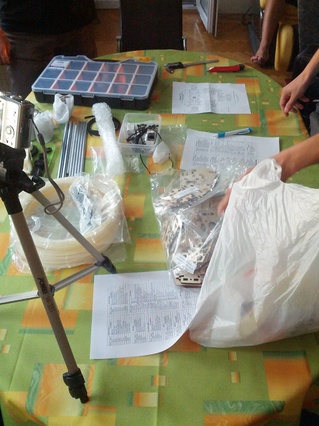
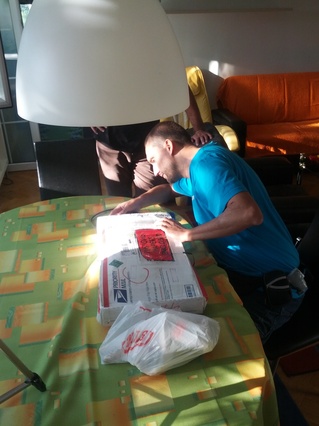
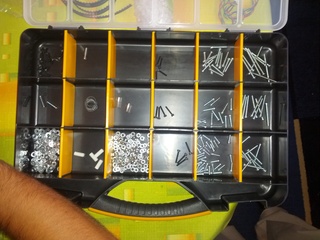
To be honest, we did upgrade to bigger Printrbot PLUS so I guess we should expect a lot of parts. As we are mostly software geeks, we did only reasonable thing to do: check if all parts are present comparing it with bill of materials which we got printed out.

IMG_20120907_183819.jpg IMG_20120907_183833.jpg IMG_20120907_185152.jpg

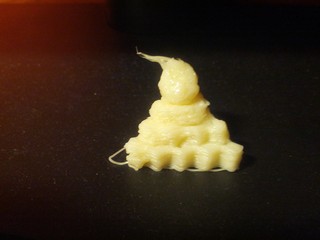
This is the point where our problems started. We had missing one bag of parts which included termistor and switches. We contacted Printrbot HQ and they sent us missing parts. We started assembling following Printrbot Building Instructions by Brook Drumm and it took us more than 50 hours to get to our first blob.

IMG_20121019_232542.jpg

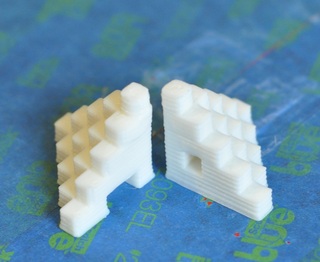
Of course, it didn't work perfectly on first run. We where trying to print 5mm Calibration Cube Steps is ABS plastic which we received with our Printrbot (we even got additional 450g of ABS plastic as replacement for power supply which wasn't part of international shipments).

5mm_Cal_Cubes.jpg

Actually, it still doesn't work well as you can see in video below, but we are hopeful. In the meantime we figure out that best source of information is Printrbot Talk forum and wiki. Forum is somewhat depressive since most users have some kind of problems with their built, just as we do.

To be honest, we didn't expect smooth ride. However, as I mentioned before we are not really hardware hackers, and my only conclusion is that home-made 3D printers are really for people who already have enough experience to make their own 3D printer, and not for software guys like us. However, we won't give up, and I fully expect to have working printer (after we get replacement barrings from Printrbot HQ because our are sticky). We are collecting useful add-on models and instructions on our Printrbot wiki page but I didn't expect that we will have to contact Printrbot HQ twice for missing and replacement parts. But eventually we will be able to print Raspberry Pi box, I hope :-)

We had software RAID in form of md devices on Linux for a long time. Here are few useful hints how to make it work better...

Scrub your array to check data consistency

I will assume that you are already monitoring your disks using smart, but from time to time it's useful to force full re-scan of your array to make sure that all data is still there and consistent. Some filesystems provide this option to scrub data on it's own (zfs and btrfs comes to mind) but if your filesystem is located on md array you can always force it using

echo check > /sys/block/md0/md/sync_action
I would suggest to do this from cron, hopefully during weekend or some other time when your load is lower.

Adding write-intent bitmap to speed up recovery

If you installed your md array a long time ago, you probably didn't turn on write-intent bitmap. It's very useful when you have to recover because bitmap will track changes and this will prevent long re-sync times when disks have to read and compare every block. To turn it on use:

mdadm --grow --bitmap=internal /dev/md0

Mirror between two devices of same speed

Recently, one of my 500Gb disks in RAID1 (mirror) failed. I decided to replace it with 1Gb drive which was unfortunately green drive (which basically means slow). Adding two drives of different speed in mirror will reduce performance to single slower drive which is a shame. Since I wasn't able to add additional disk and wasn't prepared to give up redundancy of data I started searching around and found that I can specify one disk as write-mostly using:

mdadm --add /dev/md0 --write-mostly /dev/sdb1
Same trick will work on combination of hard drive and SSD, but in that case, you will slow down writes to speed of your hard drive.

As you all know by now, last week we had another DORS/CLUC conference. This time I had two talks and one workshop.

SysAdmin Cookbook.png

Sysadmin cookbook

I never proparly introduced this project here, but if you want to know more about my convention based documentation examine the presentation of hop over to https://sysadmin-cookbook.rot13.org/ and take a look at generated documentation.

Basic idea is to document changes in easy to write files on file system (preserving symlinks to files on system which allows you to quickly see if cookbook is deployed or not and diff between template and deployed configuration). I know that my cookbook is mix of various things I did in last three years, but I do find it useful, so hopefully it might be useful to you also.

Kindle - so much more than ebook reader.png

Kindle - so much more than ebook reader

This was longer talk about my one year experience with Kindle. I must say that I'm still very happy user of Kindle, but in this talk, I tried to cover Kindle Developer's Corner at mobileread forum as well as other related projects: So if you are still wondering if it's worth the effort to install third-party software on Kindle, answer is yes, it is!.

Web scale monitoring.png

Web scale monitoring

This was a workshop which doesn't have much with web (it's about monitoring ADSL CPE devices and provider equipment in-between), but it shows (I hope) nice way to integrate several project to provide nice scalable monitoring infrastructure. It's composed of:

  • Gearman message queue together with Gearman::Driver provide on-demand scaling of workers
  • redis saves all data from external systems (LDAP, CRM) and all results from statistics collection nicely providing data for web interface
  • PostgreSQL stores all collected data, using hstore to provide unstructured key value store for different data from different devices while still allowing us to use SQL to query data (and export it to data warehouse)
  • Mojolicious provides web interface which uses data from redis and provides JSONP REST interface for Angular.js
All in all it's a nice combination of tools which served my need quite well, so I hope it was also useful to people who attended workshop.

I have been using ZFS on Linux for some time to provide backup appliance using zfs-fuse. Since then, we got native ZFS implementation on Linux, so I decided to move by backup pool from zfs-fuse to in-kernel ZFS.

Additional reason to move pool over to new machine was to change pool's RAID level. In current ZFS implementation(s) you can't change mirror to RAIDZ1 without re-creating pool and then transfering data over using zfs send and zfs receive. However, when you are creating snapshots for years, and expiring them using script you will have hundreds of snapshots which you need to transfer.

This is where zfs-pool-replicate.pl script comes handy. It uses Net::OpenSSH to connect to two machines (source and destination), list all snapshots on source and transfer them to destination. If you have filesystem without snapshots it will create one @send snapshot which will be transferred. It will also optionally use compression for transfer of snapshot over the network. I am using LZO which is fast compression which nicely transfers 150Mb/s or more over normal 1Gbit/s network without much CPU overheard (and we all have multi-core machines anyway, right?). Current implementation allows you to re-run replication script to transfer only new snapshots creating handy disaster recovery solution.

Current implementation is designed to run from third (management) machine, so I can envision central storage administration tool which will also allow you to transfer LVM snapshots into ZFS snapshots. For now, I'm using shell script for that, but rewriting it in perl would improve error recovery and reporting.

By default, MySQL installation on Debian comes without innodb_file_per_table option which spread tables in individual InnoDB files. Based on your usage patterns or backup strategies this might be better filesystem organization than one big /var/lib/mysql/ibdata1 file. I first heard about it in OurSQL Episode 36: It's Not Our (De)fault!. It's great podcast, but to be honest with each new episode I wish to have only PostgreSQL servers to maintain...

To enable this option you will need to create configuration file and restart MySQL server:

koha:/etc/mysql/conf.d# cat > file-per-table.cnf 
[mysqld]
innodb_file_per_table
CTRL+D
koha:/etc/mysql/conf.d# /etc/init.d/mysql restart

This won't change anything, because only new tables will be created in separate files. But, we can use ALTER TABLE table ENGINE=InnoDB on each table to force InnoDB to re-read tables and create separate files:

mysqlshow koha --status | grep InnoDB | cut -d'|' -f2 | sed -e 's/^/alter table/' -e 's/$/ engine=InnoDB;/' | mysql -v koha

If you replace grep InnoDB with grep MyISAM you might use same snippet to convert MyISAM tables into InnoDB (if you still have them or don't use fulltext search).

I think that system administration is like gardening. I don't know anything about gardening, but it seems to involve a lot of care here and there, seemingly without much pattern. In that sense, it's similar to wiki editing, you start somewhere and you really don't know where it lead you to.

You have to start reading by singing lady Ga-Ga with words: S, s, s, ss... SAML, SMAL2! It will help, really.

SAML 2 is latest in long line of different SSO implementation you will have to do sooner or later if you want to be part of larger web. Google and others seems to be using it, so it must be good, right?

It has two end-points: identity provider (IdP) which has user accounts and Service Provider (SP) which is usually your application. But of course, it's more complicated than that. For a start, you will need https on your host. I will assume that you already have domain, and you can get free SSL certificates at StartSSL so hop over there if you need one.

First, install SimpleSAMLphp. It's pimpliest possible way to get working SAML2 implementation of IdP and SP. You will want to follow first simpleSAMLphp Installation and Configuration and then SimpleSAMLphp Identity Provider QuickStart to configure simple IdP with static accounts so you can test your application against it. You will need both IdP and SP under your control to do development. It will also help if your remote IdP (identity provider which you intend to use) is also simpleSAMLphp (as AAI@EduHr is).

Installation is rather easy:

dpavlin@lib:/srv$ sudo apt-get install install memcached php5-memcache

dpavlin@lib:/srv$ wget http://simplesamlphp.googlecode.com/files/simplesamlphp-1.8.0.tar.gz

dpavlin@lib:/srv$ tar xf simplesamlphp-1.8.0.tar.gz
dpavlin@lib:/srv$ cd simplesamlphp-1.8.0/
dpavlin@lib:/srv/simplesamlphp-1.8.0$ cp config-templates/* config/
dpavlin@lib:/srv/simplesamlphp-1.8.0$ vi config/config.php
You will want to edit following options:
  • auth.adminpassword
  • secretsalt
  • enable.authmemcookie
dpavlin@lib:/srv/simplesamlphp-1.8.0$ php5 -l config/config.php 
No syntax errors detected in config/config.php
Interesting part here is authmemcookie option. This allows us to use SP side of simpleSAMLphp and store resulting authentication in memcache and send browser a cookie which we can later read and acquire data from memcache about current user.

To configure Apache side, you need Auth MemCookie but it isn't available in Debian package, so I opted for Apache::Auth::AuthMemCookie so I can flexibly modify IdP response before passing it on as environment variables.

dpavlin@lib:~$ cat /etc/apache2/conf.d/authmemcookie.conf 
Alias /simplesaml /srv/simplesamlphp-1.8.0/www
perlModule Apache::Auth::AuthMemCookie
<Location /cgi-bin>
        # get redirected here when not authorised
        ErrorDocument 401 "/simplesaml/authmemcookie.php"
        PerlAuthenHandler Apache::Auth::AuthMemCookie::authen_handler
        PerlSetVar AuthMemCookie "AuthMemCookie"
        PerlSetVar AuthMemServers "127.0.0.1:11211"
        PerlSetVar AuthMemDebug 1
        PerlSetVar AuthMemAttrsInHeaders 0
        AuthType Cookie
        AuthName "Koha SAML"
        Require valid-user
</Location>

To test it, easiest method is to create account in Feide OpenIdP and test against it. After all, it easiest to start with same implementation of SAML2 on both sides just to prevent following scenario:

On perl side I first tried Net::SAML2 and found out that it doesn't handle IdP without adding HTTP-Artifact support to the IdP. However, even after that I wasn't managed to make it work with simpleSAMLphp IdP implementation mostly because of my inpatience with SSL configuration of it.

On the bright side, for first test I didn't need to modify Koha (Library management software which I'm configuration SAML2 for) at all because it already has support for HTTP authorization.

Update 2013-10-15: If you have a large SAML sessions (by default more than 20000 bytes) you might run into problems. By default, php memcache library compresses content if it's larger than value configured in memcache.compress_threshold. This will result in wired behaviour where some sessions (smaller than limit) will work fine, while larger ones will be compressed and Apache::Auth::AuthMemCookie won't know how to read them, thus creating loop in authmemcookie.php which you will see in your logs as accesses to any URL on your site. To step-aside this problem, I decided to increase threshold to 100000 bytes hoping that my sessions will be smaller than this:

dpavlin@lib:~$ grep compress /etc/php5/apache2/conf.d/memcache.ini 
memcache.compress_threshold=100000

While ago, I started writing MojoFacets, fast web-based faceted browser which keeps data in-memory. Since I last wrote blog post about it I added various features to it turning it into powerful spreadsheet-like application within browser in which you can mangle your data using perl code.

Let me start with a list of new features:

  • run perl snippet over filtered subset of data, modifying columns (using $update) or creating aggregated result (using $out)
  • format on-screen filter html with hidden ;, so that copy/paste into spreadsheet produce correct values and counts
  • export dataset as tab separated values for easy migration into other applications
  • use tab separated export and optional time format string with gnuplot to produce png graphs from data (this works well for huge datasets)
  • export filtered values from facets in simple one-value per line format
  • run perl snippets over filter's facet values to easily select ($checked) or calculate something with $value or $count
  • import of CSV files (with optional encoding specified in filename)
  • import from CouchDB databases or view
  • import SQL query results from RDBMS using any DBI perl module (tested with PostgreSQL, mysql and SQLite)
  • switch between loaded data-sets easily (filters are already shared between them, allowing poor man's join)
  • implement lookup into different data-set with descriptive statistics on values

Adding perl code evaluation over dataset was logical extension since I already had web interface written in perl which had all data in memory. To make it fast, I had to implement indexes (and invalidation). But small things, like automatic generation of meaningful names for code snippets in form of dependent_col1,dep_col2.result_col1,res_col2 turned read-only web interface into powerful tool for application of reusable code snippets on data.

Latest feature is lookup to other datasets with ability to create multiple columns from lookup values. MojoFacets is now sufficiently advanced to replace relational database for quick join-like problems, but this time by writing a little snippet of perl looking like this:

lookup($row->{issn}, 'nabava', => 'issn', sub {
  my $stat = shift;
  push @{ $update->{listprice} }, $on->{listprice};
  $stat->add_data( $on->{listprice} );
},sub {
 my $stat = shift;
 $update->{price_min} = $stat->min;
 $update->{price_max} = $stat->max;
});
This will lookup using $row->{issn} into nabava dataset using issn column. First sub is executed for each value in lookup date (using $on hash) and second one is executed once to create aggregates using $stat which is Statistics::Descriptive object. Second sub is optional if you don't need aggregates.

If you found Google Refine and wanted something similar, but in perl (with perl as query/mangling language) MojoFacets might be good choice.

akred1-85.60x53.98-var.png

I had a interesting problem with conference name tags this week. I wanted to use free software stack to produce them, and it turned out that this required patching bash to properly parse CSV files and learning new pdf tricks to print multiple pdf pages on single sheet of paper, so I will try to document them here, so I won't have to discover it again in two years for next one...

For design, we decided to use Inkscape, great vector drawing program. And even better, it already included Inkscape Generator extension just for that purpose.

For design, we decided to use ISO 7810 ID-1 card size of 85.60 × 53.98 mm and included template variables required by extension as you can see on picture.

Data for conference participants ended up in Gnumeric, and where exported in CSV file. And that's where we hit the first road-block. Current version of ink-generate extension doesn't support more than one comma inside quoted field. However, Inkscape Generator extension home page included useful pointer to correct bash code to parse CSV files by Chris F.A. Johnson so I decided to import it into ink-generator git repository and replace CSV parser. Few patches later and I had working extension which produces 600+ pdf files on disk.

In the process, I learned that you can invoke Inkscape extensions from command line, which is nice for generating previews while you edit code:

./generator.sh --var-type=name --data-file=test.csv --format=pdf --dpi=90 --output='$HOME/generator-output/%VAR_id%.pdf' --extra-vars=" " --preview=true akred1-var.svg
If --preview=true is removed, it will generate all files without GUI interaction, which is nice for automation.
To make it sorted by last name, we created fake id column padded with zeros.

pdfnup-2x5.png

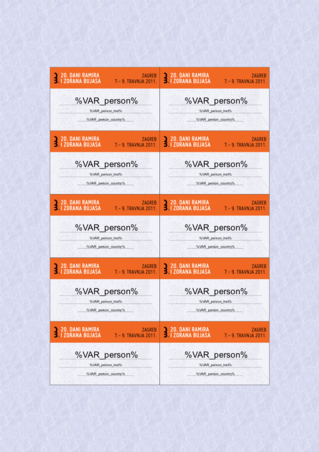
Now we had to print them. While some printer drivers have option to print multiple pages, the one we where using decided to center each name tag requiring too much cutting each side of each name tag manually. This was obviously non-efficient, and I knew about psnup utility for PostScript, but I didn't know that there is pdfnup which is part of PDFjam (and in Debian package). However, getting layout just right involved reading pdfpages package documentation, but this is what I ended up with:

pdfnup --suffix nup --nup '2x5' --paper a4paper --no-landscape --noautoscale true --frame true --outfile nup.pdf -- ~/generator-output/*.pdf

This produces layout which you can see on the picture, nicely centered in the middle of the page (this is why I included fake grain background to show centering).

In the end, it didn't really worked out. Parsing CSV correctly (and supporting quotes inside quoted values) is a hard task in bash, and I had to admit that I don't really know how to fix it. With only a day to start of conference and no time to waste, I took my favorite language of choice, perl and wrote 60-line script which does same thing but uses Text::CSV perl module to parse data files.

There is something to be learned here: for a start language and good supporting libraries does matter. Second, sometimes you are better off starting from scratch. But that decision should be made only when you exhorted other options since fixing original extension would have benefit for wider community. There is a balance between scratching my own itch and common good which is tricky.

If you talked with me in last years or so, you probably heard me mention queues as new paradigm in application development. If your background is web-development, you probably wondered why are they important. This blog will try to explain why they are useful and important, and how you can make your app scale, even on same box.

Problem was rather simple: I needed to make monitoring which will pull data from ~9000 devices using telnet protocol and store it in PostgreSQL. Normal way to solve this would be to write module which first checks if devices are available using something like fping and then telnet to each device and collect data. However, that would involve careful writing of puller, taking care of child processes and so on. This seemed like doable job, but it also seemed a bit complicated for task at hand.

So, I opted to implement system using Gearman as queue server, and leave all scaling to it. I decided to push all functionality in gearman workers. For that, I opted to use Gearman::Driver which allows me to easily change number of workers to test different configurations. Requirement was to pull each machine in 20-minute intervals.

Converting existing perl scripts which collect data into gearman workers was a joy. At first run (with 25 workers) it took 15 minutes to collect all data. Just by increasing number of workers to 100 we managed to cut down this time just over 1 minute. And that's on single core virtual machine (which makes sense, since most of the time we are waiting on network).

For web interface, I decided to use Mojolicious. But, to make it work with Gearman, I write MojoX::Gearman which allows me to invoke gearman functions directly from Mojolicious. In fact, all functionality of web interface is implemented as Gearman workers, even querying database :-)